The following is the official Tile Floor Deep Cleaning procedure as recommended by Marblelife, the world’s leading professionals who repair, restore and maintain natural stone. Before beginning care for your natural stone, tile or grout surface, please visit the Common Mistakes section to help you avoid the all too common mistakes that result you calling for repair help.
What is Deep Cleaning & When is it Necessary?
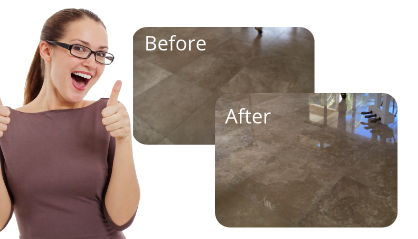
Deep cleaning is the process of getting the cleaner through the built up layer of accumulated residue, into the crevasses of the tile and the pores of the grout where the oils and dirt are trapped. The reason for deep cleaning tile & grout is to remove the oils, grease, dirt and residues that have become trapped in the pores and may have even built up layers on the surface causing the floor to look dull. Deep cleaning helps to loosen and lift out the trapped debris from the tile & grout, and bringing it back to a clear shinning appearance. Deep cleaning is also recommended prior to sealing grout.
There are two recommended methods for cleaning tile & grout floors. One is with a spray bottle and a microfiber mop or swiffing type mop and the other is a new spin on the mop and bucket method. Both will provide excellent results and is the preference of the operator, however, for best results, ease of use and being Eco-friendly the spray bottle and microfiber mop or swiffing type mop is the most recommended method. When possible with either method, using a soft deck brush or floor brush when available is for additional scrubbing action.
Spray Cleaner & Towel Method
Best possible results and Eco-friendly procedure. Most Recommended
Recommended supplies:
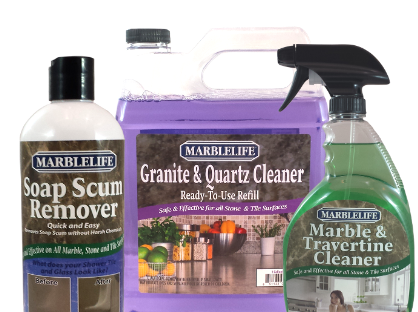
- Marblelife Tile & Grout Cleaner 32oz spray bottle
- Scrub Brush and optional Wallpaper Brush
- Microfiber Mop or swiffing type mop
- A pile of microfiber towels or other clean towels or cloths (microfiber is best)
- Soft Deck Brush (optional if available)
Step 1 – Spray & Scrub
Use a soft floor brush when available; otherwise proceed with the hand scrub brush. Spray a generous amount of Marblelife Tile & Grout Cleaner directly onto the floor and scrub vigorously with a brush. Allow to soak for about 5 minutes, then scrub again, adding additional cleaner as desired. This loosens and absorbs the oils, dirt and residues that have collected on the surface and in the pores.
Step 2 – Mop Up
Mount a clean towel onto the microfiber mop by pushing the towel into the push in holes or to the Velcro if your mop is equipped with it or use a towel by hand. Mop up the Tile Cleaner carrying the debris from the tile floor. After mopping up the first application, assess the situation. If the residue was really bad, repeating Step 1 through 2 may be warranted. Otherwise, if the residue was not too bad, proceed to Step 3.
Step 3 – Spray & Wipe
Mount a clean towel onto the mop or with towel by hand, spray the cleaner directly onto the floor covering an area size that you are comfortable working at a time and proceed to wipe with the mop and towel. This collects any residue left from the initial deep cleaning.
Step 4 – Buff Dry
Flip over a dry section of your towel or replace with clean towel and buff dry to reveal a clean mirror like shining surface. Proceed to the next area and repeat the previous steps until the floor is done. Any clean soft cloth with do, however, a microfiber towel is recommended do to its extremely fine fibers that reach into the crevasse of the tile and the pores of the grout.
Mop & Buckets Method
This is a professional’s tweak on an age old method. The problem with mop and bucket is that each time you rinse out you mop, you put dirty water in your cleaner. This quickly makes your cleaner part of the problem, depositing more diluted dirt into any open pores and the grout. It also spreads germs. Instead, we recommend that if you choose to use mop and bucket, that you use two buckets. One is for your cleaning solution and the other is for rinsing out your mop. This way you continuously are using clean solution to clean your floors.
The towels are for drying the floor. Allowing your cleaning solution, which has absorbed oils and dirt, to dry on the floor can cause streaks that consist of the oils and dirt. To achieve the streak-free shine you expect, you will want to dry the floor with the towels.
Recommended Supplies:
- Marblelife Tile & Grout Cleaner Concentrate
- 2 Mop buckets half filled with warm water (one for cleaner & one dirty water)
- Mop of your choice
- Floor Scrub Brush
- Pile of clean microfiber towels or other clean soft towels or clothes
- Soft Deck Brush (optional if available)
Step 1 – Setup Two Buckets
First add 2oz of Tile & Grout Cleaner Concentrate per gallon of warm water in your cleaner bucket. The other bucket is your rinse bucket which should be half full of warm water which will be for rinsing out your mop after each use. You will empty your rinse bucket and refill with warm water as need to keep your mop returning to the cleaner bucket relatively clean.
Step 2 – Wet & Scrub
Apply a generous amount of Tile Cleaner from our cleaner bucket, directly onto the floor and scrub vigorously with the floor brush. Allow to soak for about 5 minutes then scrub again, adding additional cleaner as desired. This loosens and absorbs the oils, dirt and residues that have collected on the surface and in the pores.
Step 3 – Mop Up
If using a mop, next rinse your mop in the rinse bucket. With a clean mop, proceed to mop up the cleaner which now carries the oils, dirt and residue. Continue to rinse and mop up until the now dirty cleaner is removed.
Step 4 – Clean Up
After your initial deep cleaning and rinsing process, you will now proceed with the daily cleaning procedure to remove any remaining cleaner with residue from the floor.
Rinse the mop in the rinse bucket, then soak the mop in the Tile Cleaner bucket and wring out the mop. Proceed to mop the floor, removing any remaining residue, then proceed to step 5.
Step 5 – Towel Dry
Before allowing your cleaning solution to dry on the floor, towel dry with your clean floor towels. If you prefer not to kneel, you may use your mop or other floor tool such as a broom to push the towel around the floor. Toweling the floor dry is important so that the remaining oils and dirt that are dissolved into the cleaner are removed so as not to cause streaks. Repeat the above steps until floor is done. Any clean soft cloth with do, however, microfiber towels are recommended do to their extremely fine fibers that reach into the pores of the marble.
Marblelife… Helping Make Your Life Easier.